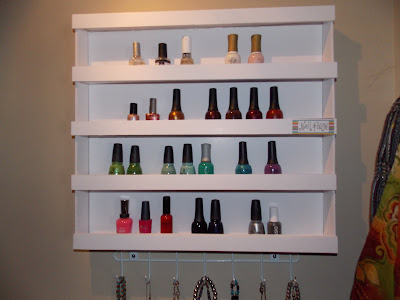
NAIL POLISH SHELF
Can you guess what it is made out of?
Foam Board! Yep! That's what I said!
Now here's how I used to keep my polishes.
I don't have a large collection, but I knew there had to be a better way to organize them.
So how did I decide on a polish shelf? By looking on youtube of course!
http://www.youtube.com/watch?v=pSk8-qFIvVA - I recommend watching this video for more instruction!
Above (I think) is the link to a youtube video by theeasydiy.
So thank you Easy DIY!
SUPPLIES:
2 foam core boards
yard stick and/or metal square
pencil
X-acto knive
hot glue gun and several hot glue sticks
Since I was making a much smaller version of the shelf, I made up my own measurements.
The following shelf will hold up to 48 nail polishes.
Cut the foam boards as follows:
20"x18" (this will be the back of the shelf
5 strips 2"x20"
2 strips 2-1/4"x18"
5 strips 1"x20"
This is a picture of my husband, Gary, cutting the strips for me.
(he's much better with an X-acto knife than I am)
I'm not ashamed to say it!
The above picture looks elongated - but actually the shelf is 20" long and stands 18" tall.
Mark lines across the width of the backboard,
4-1/2" apart using a square to get them at 90 degree angles (three lines total)
Now use a hot glue gun to attach three of the 2"x20" strips onto lines.
Glue the remaining 2"x20" strips to the edges of the board, for the top and bottom.
Next, attach the side pieces. I double secured each shelf with an extra line of glue along each one.
I wanted an "end cap" on my shelves, to keep the nail polishes from sliding off.
So I then glued the 1"x20" pieces on top of the edges of the shelves, as well as the top and bottom.
Attach Command strips to the back to attach to your wall.
Close-up of the "end cap" on one of the shelves.
And that's all there is!
Here is a picture of my Nail Polish shelf in my closet. It looks great!
I even made a little "Nail Polish" label to cover up a boo-boo on the shelf.
This whole project cost me less than $5. Yay!
Thanks for reading, and remember to:
Keep Calm and Kerri On!


This makes me want to buy more nail polish! lol. I only have maybe 10 colors, but Mady is at the age now where she LOVES her "nays paint!". She brings me my ziploc bag of polish at least every other day. Yes... they are in a ziploc under my bathroom sink. lol. I may just have to build myself one of these! Thanks for the awesome instructions!
ReplyDeleteI have wanted to do this. I have almost 100 polishes. I'm afraid it wouldn't hold and everything would come tumbling down!
ReplyDelete